Products
Leeb hardness tester THL210
LCD display of 128×64 matrix with back-light, showing all functions and parameters.
Converts to all common hardness scales (HV,HB,HRC,HRB,HRA,HS).
Easy and convenient menu operation.
Powerful PC Software available and USB 1.0 interface and USB with Protective Membrane.
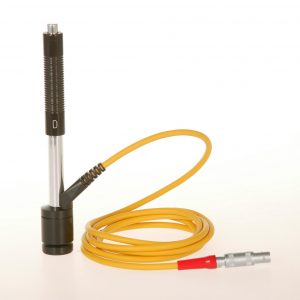
7 types of Impact Device optional, which don’t need to be recalibrated when changing them.
Memory of 600 groups data(impact times:32~1).
Lower limit setting and sound alarm.
12 month warranty
Features
LCD display of 128×64 matrix with back-light, showing all functions and parameters.
Converts to all common hardness scales (HV,HB,HRC,HRB,HRA,HS).
Easy and convenient menu operation.
Powerful PC Software available and USB 1.0 interface and USB with Protective Membrane.
7 types of Impact Device optional, which don’t need to be recalibrated when changing them.
Memory of 600 groups data(impact times:32~1).
Lower limit setting and sound alarm.
Material of “cast steel” is added; HB values can be read out directly when D/DC impact device is used to measure “cast steel” work piece.
Printer can be separated from the main unit and copies of testing results can be printed as required.
Normal battery AAA and big power storage while USB connected and charging controlling circuit.
Inbuilt function of Software Calibration.
Specifications
| Hardness scale | HL, HB, HRB, HRC, HRA, HV, HS |
| Memory | 48~600 groups (impact times: 32~1) |
| Measuring range | HLD(170~960)See below table 1 and table 2 |
| Accuracy | ±6HLD (760±30HLD) error of displayed value 6HLD (760±30HLD) repeatability of displayed value |
| Standard Impact Device | D |
| Optional Impact Devices | DC/D+15/G/C/DL |
| Max. Workpiece Hardness | 996HV(For Impact Devices D/DC/DL/D+15/C) 646HB(For Impact Device G) |
| Min. Radius of Workpiece | Rmin = 50mm (with special support ring Rmin= 10mm) |
| Min. Workpiece weight | 2~5kg on stable support 0.05~2kg with compact coupling |
| Min. Workpiece thickness | 5mm (Impact Devices D/DC/DL/D+15) 1mm (Impact Device C)
10mm (Impact Device G) |
| Min. thickness of hardened surface | Min. thickness of hardened surface 0.8mm |
| Power | Normal AA Battery |
| Continuous Working time | approx. 100 h (no back light off) |
| Operating temperature | 0~40℃ |
| Relative humidity | ≤90% |
| Overall dimensions | 125*67*31mm (main unit) |
| Weight (main unit) | 0.3kg |
Standard Configuration
| Seq | Name | Qty | Remark |
| 1 | THL210 Main Unit | 1 | Standard configuration |
| 2 | Impact Device Type D | 1 | Standard configuration |
| 3 | Leeb Standard Test Block | 1 | Standard configuration |
| 4 | Cleaning Brush | 1 | Standard configuration |
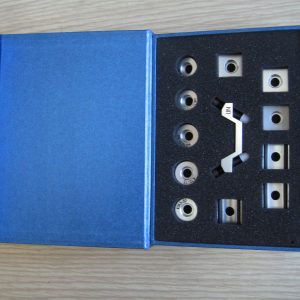
| 5 | Supporting Ring | 1 | Standard configuration |
| 6 | Communication Cable | 1 | Standard configuration |
| 7 | Manual | 1 | Standard configuration |
| 8 | Carrying Case | 1 | Standard configuration |
| 9 | THL210 DataPro Software(USB) | 1 | Standard configuration |
| 10 | Mini-printer | 1 | Optional configuration |


